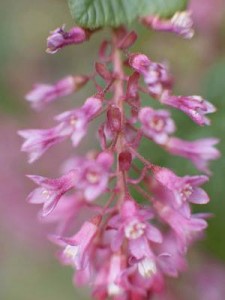
(Ribes sanguineum var. glutinosum ‘Claremont’) Zones 6–8
Shade- and drought-tolerant, this California native delivers dark-green leaves, clusters of rosy-pink blossoms—and almost no maintenance!
(Ribes sanguineum var. glutinosum ‘Claremont’) Zones 6–8
Shade- and drought-tolerant, this California native delivers dark-green leaves, clusters of rosy-pink blossoms—and almost no maintenance!
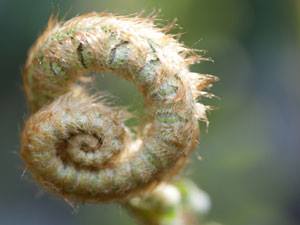
(Matteucci struthiopteris) Zones 3–8
These dramatic plume-shaped fronds reach heights of three to six feet and naturalize easily. And while ostrich ferns prefer shade, they’ will grow in full sun.
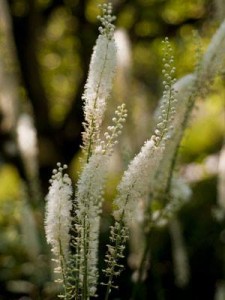
(Actaea simplex ‘Brunette’) Zones 4–8
Black bugbane has wonderful burgundy foliage; three-foot-tall, cream-and-pink flowers that fill the garden with an intoxicating scent in late summer; plus, it’s deer-proof. All in all, a great plant to mass.
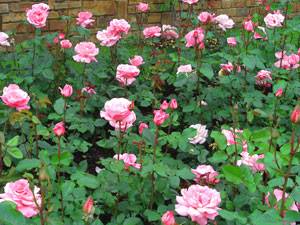
(Rosa ‘Noatraum’) Zones 5–10
No matter what soil you plant it in, this glamorous—and disease-resistant— ground cover rewards you with tons of roses two to three times a year.
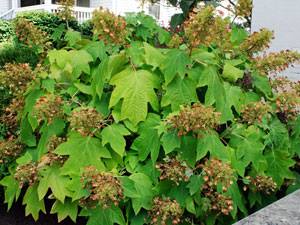
(Hydrangea quercifolia) Zones 5-9
One of the easiest, showiest, most useful perennials, this hydrangea boasts bold foliage that turns maroon in the fall, as the huge flower clusters fade to pink. It’ll also tolerate dryish shade and thrives in just about any climate
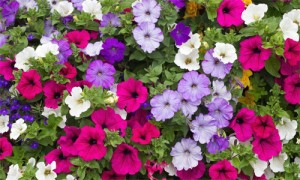 These brilliantly colorful, yet short-lived, annuals are especially rewarding plants to grow in your yard because they are fun, versatile and are easy to care for. Made a few mistakes with placement this year? Don’t worry they won’t grow back next year and you can try again!
Annuals grow fast and bloom young, even while they’re still in little nursery packs. Annuals defiantly give you the most bang of color for your money than any other plants! An annual is defined as a plant that undergoes its entire life cycle within one growing season. Each plant will eventually die after a growing season leaving behind seeds that may have an opportunity to sprout and start the entire annual life cycle all over again!
Planting Annuals
There are two main types of annuals. Hardy annuals can tolerate some frost. Snapdragons and Calendulas are examples of hardy annuals. Tender annuals like warm soil and warm air temperatures. Most annuals are tender annuals. Annual seeds can be directly sowed into the garden after the last frost and the air and soil temperatures have warmed, or they can be planted indoors earlier in the spring. Most seed packages tell when to plant seeds indoors or outdoors.
Planting Outdoors
The first thing you need to consider is where to plant your annual seeds outdoors. Annuals are very good at adding color to your garden so plant the seeds as fillers among perennials or in spots where perennials have disappeared during winter months. Containers also make an excellent place to plant annual seeds. Many annuals will come back year after year because they self-sow from the previous year if the plants have gone to seed. Be careful though, letting your annuals self-sow, because each pod produces many seeds and you may end up with more plants then you want.
Start by working your soil about 6-8 inches deep. Mix in some compost and then rake the spoil smooth. Depending on the design you want, either sprinkle the seeds in shallow rows or broadcast in a drift. Cover your annual seeds very lightly. Water your annual seeds using a wand that sprays gently so as not to disturb the seeds. Even after you have seedlings, water carefully so as not to disturb the tender roots. After the seedlings develop the first pair of true leaves, thin to the spacing recommended on the seed packet.
Planting Indoors
Buy some seed planting trays with cells or just use the trays. These trays can be used year after year as long as the trays are clean. If you want to plant just a few annual seeds, you can use egg cartons, milk cartons or cans, as long as you punch holes in the bottom of the containers for drainage.
1. Choose a fine, light textured potting soil that is designed for seeding indoors.
2. Water the potting soil before planting. The soil should just be moist. Bottom watering is also recommended.
3. Cover the seeds very lightly with a fine dusting of soil. Check the seed packet for the recommended amount of soil to put on top.
4. Label each section, so that you can plant a variety of annual seeds in each tray.
5. Use a spray bottle and spray a fine mist over the soil until you see seedlings emerge. Then increase the watering and always keep the soil moist. Never let the soil dry out.
6. You can cover your trays with clear plastic to keep the soil warm and moist. Remove the plastic when you first see seedlings appear.
7. When your seedlings have 2 true leaves, transplant them into larger cells where they will continue to grow until the outdoor air and soil temperatures are warm enough to plant in the ground or containers.
I just bought 40 lbs. of potatoes at the farmer’s market. How do I store them? Well here is your answer!
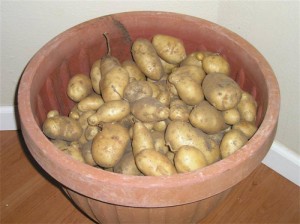
Rub off any large clumps of dirt (potatoes should never be washed before storage) and cull any damaged tubers, which should be eaten, not stored. Treat the tubers very gently so as not to bruise or cut them. Nestle your spuds into ventilated bins, bushel baskets, a Root Storage Bin or a cardboard box with perforated sides. Completely cover the boxes or baskets with newspaper or cardboard to eliminate any light. Even a little light will cause potatoes to turn green and be rendered inedible. The ideal storage temperature for potatoes is 35 to 40 degrees, though they will usually keep for several months at 45 to 50 degrees.
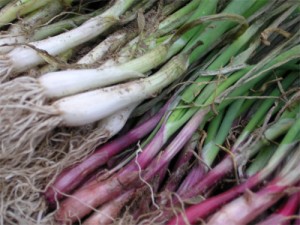 Sets are a good choice if you want scallions (green onions), but you’re not likely to get large onions. Though it might sound unlikely, you’ll get bigger onions if you start from seeds and seedlings.
 Wait until the danger of frost has passed and the weather has settled. Use the last average frost date in your area as a guide. For example, in Burlington, VT, the average last frost date is mid May.
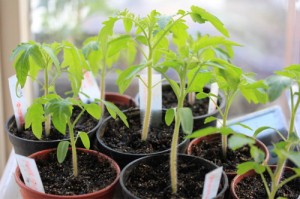
So, we traditionally set out our tomato transplants around Memorial Day. About a week before transplanting your seedlings, start hardening them off by gradually exposing them to outdoor conditions. Place the pots in a protected spot outdoors (partly shaded, out of the wind) for a few hours each day, bringing them in at night. Gradually expose them to more and more sunshine and wind. (A cold frame is a great place to harden off plants.)
Once you plant your seedlings in the garden, keep an eye on the forecast. Every year is different and a late cold snap can stunt or kill plants. Always be prepared to cover plants with a row cover, such as our Garden Quilt Cover, if a late cold snap threatens. Eager to get an earlier start? With Tomato Teepees, you can plant a few weeks earlier.